Monday, 11 July 2016

20th June 2016 - Heater matrix leak

On our return from the Bullet Run I noticed a few drips of something on the passenger side rubber mat and a finger /sniff test proved it to be coolant. So it could only come from the heater which meant the whole dash would have to come out. Bugger!

Water on the carpet means a heater leak!
Removing the dash assembly and heater from a TR7 is not too difficult but it is just fiddly. There are lots of fixings in places you might not expect but the factory workshop manual took me through it step by step with numbered pictures of where all those hidden screws are located. It also gives you the confidence you haven't forgotten something and without it the job would certainly have taken much longer.  I also took lots of pictures along the way to help me remember where all the wires etc were positioned.

Dash and heater unit removed.
With the heater unit out it was clear to see that it had been leaking from the matrix seals.   These are well known to cause trouble in TR7's, they were fine when it was new but after 40 years its not surprising that they can fail. The problem is that they are one of the few TR7 parts that are no longer available. New old stock ones do appear for sale occasionally at inflated prices but they are also 30/40 years old so I would not trust them anyway. The other issue is the metal pipes that go from the matrix to the engine compartment also go rusty and cause problems. There is an expensive modern stainless steel option to fix this as well and luckily my car already had the stainless pipes so a previous owner had obviously been there before me.

The infamous heater matrix seals.
 I ordered a replacement modified heater matrix from Steve Wilcox at S&S Preparations which has normal outlets and does away with the seals and comes complete with hoses, jubilee clips and even the self adhesive foam to go round the outside.

S&S Preparations heater matrix kit.
The only problem was that I had to shorten my nice shiny stainless pipes to go with the new matrix and hoses which felt a bit like sacrilege. They are also expensive so I didn't want to get it wrong and have to buy some more.

Stainless heater pipes had to be shortened.
 The heater unit itself is mostly held together with lots of pop rivets which have to be drilled out. Again the workshop manual was very helpful with step-by-step instructions to follow because its quite a complicated item with lots of levers and flaps to disconnect. Once it was all apart I also took the chance to renew all of the rubber foam seals on the various flaps, most of which had long since disintegrated.
Old foam rubber debris inside the heater.
 Re-assembly was another case of following the steps in the manual and lots of pop rivets to do.  I had plenty of rivets in stock but they turned out to be mostly too long so I had to buy some more short ones, 3.2mm by 6mm long.   Best deal I could find at short notice was a box for £4.99 - but it had 1000 rivets!  I must have enough left over to fix all the TR7 heaters in the UK.

Before and after matrix replacement
These pictures show the stages in replacing the matrix, 1 original, 2 those troublesome seals, 3 new matrix fitted, 4 completed job.

Following advice from Steve Wilcox I connected up the heater pipes before fitting the dash and ran the engine up to temperature so I could check for leaks. Fingers crossed and it was all good to go. 

Putting it all back was just a reversal of taking it all apart, but I also took the opportunity to fit some wire mesh over the main air intake to prevent that experience of dead leaves etc being drawn into the heater and shot out of the air vents into your face.  I also tidied up some of the wiring harness which appeared to have been left to just float about.
Wire mesh on main air intake.


So after all that work it looked like it did before, but without the wet spots on the mat. I also had a heater that all the flaps worked properly and sent hot or cold air where you asked it to.

Job finished.


Wednesday, 6 July 2016

17th June 2016, Bullet Run

The TRDC decided it would be a good idea to mark the 40th anniversary of the TR7 launch in the UK and also the recent death of Tony Lee who was the Triumph Chief Development Engineer.  The result was the Bullet Run which followed the old factory test route up to Bwlch-y-Groes in North Wales.  Bullet was the factory code name for the TR7 when it was still in the design and testing stage.


Day 1.  About 40 TR7/8's of various types came, with some being driven by members of Tony Lee's family who had been invited to take part.  Some of us started from the base hotel near Stratford-on-Avon with others joining us at a rest stop in Oswestry. From here the roads became much more interesting as we drove up to the next stop at Lake Vyrnwy.

Some of the cars at the hotel start.
Our lunch halt location, Lake Vyrnwy dam.
Leaving Lake Vyrnwy the route follows a narrow mountain road up to Bwlch-y-Groes which is the highest mountain pass in North Wales. During the 1960's and 1970's this road was used regularly by several car makers to test their new vehicles. The modern road is all single track tarmac but back in those days much of it was still a gravel surface.

TR7 traffic jam on the road to Bwlch-y-Groes
Photo opportunity.
Nearing the top of the pass.
Having stopped to admire the views and take a couple of pictures we arrived at the summit car park to find it full of TR7's. Many of the first wave were just moving off as we got there but it was soon full again. Lots more pictures followed before we set off down the other side to Bala. As you can see the weather was perfect for everyone to enjoy the great views.

TR7's only allowed!
 From Bala many crews decided to take the quickest way back to the hotel via the motorways but we chose to take a much nicer cross country route.  This took us across the B4391 to Llangynog which is a superb road to drive. It is a fast sweeping mountain road with no traffic so I was able to push the car quite hard and it handled perfectly.  Exactly the kind of road the TR7 was built for.  The fast corners and sudden changes of direction suited it perfectly with no dramas at all. Great fun.

Back at the hotel they had prepared an excellent buffet for us followed by a talk from Gordon Birtwistle who was the Triumph High Speed Development driver and has an endless supply of amusing stories from those days. Very interesting chap.

Day 2.  The organisers had arranged for us to visit the Midlands Air Museum at Coventry Airport where we were able to park the cars amongst some of their 70 or so historical aircraft.  They have all sorts of planes from a Fairey Gannet to a Vulcan  and even a more modern Russian attack helicopter.  We especially liked to be able to climb up into the Vulcan bomber cockpit to see where a crew of five worked to fly with our nuclear deterrent. We were also able to sit in a Gloster Meteor and an Armstrong Whitworth Argosy cockpit.

Another photo opportunity.

My partner Jo in the Vulcan cockpit
Driving home after lunch we came across lots of old motor cycles on their own tour and talked to some guys in a 1914 AC Sociable which had stalled. Never seen one of those before.

1914 AC Sociable
 We arrived home having done almost 500 miles in the TR7 which had behaved itself perfectly.

Wednesday, 11 May 2016

8th May 2016, Glavon Vale of Evesham Run

After hopefully fixing the carburettors, I was interested to find out how the car actually drove so our Glavon TR Register group day out on 8th May was ideal.  Turns out it was the hottest day of the year so far and a proper test. We had a mixed group of 14 cars with TR3,4,5&6 but mine was the only TR7. During the day three of the TR5/6 broke down due to the heat but the TR7 didn't miss a beat.
It was raining at the start!
Driving to the start we had some light rain but the forecast was good so the roof stayed down. This turned out to be the right decision because by 10:00am it was a glorious sunny day.

The route took us from the start at Coombe Hill near Cheltenham across the River Severn at Tirley, to a coffee stop at Clive's Fruit Farm near Upton on Severn. They specialise in pick-your-own fruit, juices and cider, and I can highly recommend their home made cakes.
Coffee stop at Clive's Fruit Farm
Leaving the farm we met quite a lot of traffic at Upton on Severn which seemed to be heading for a Spring show at nearby Malvern. Several of us have CB radios so we were able to keep our small convoy together in the traffic and they came in useful when a couple of the TR5/6 broke down apparently due to the heat. It was now about 25 degrees and I actually decided to put a little sunscreen on my face whilst the cars were restarted.

Lunch was at the Fleece Inn at Bretforton. This is a lovely old 15th century pub owned by the National Trust where they do really nice food.  It is in the middle of a small village but we had arranged to park our cars in their gardens which provided a perfect location for a couple of pictures as well.
Lunch stop at the Fleece Inn, Bretforton
The afternoon run took us up onto the hills and a stop at Broadway Tower before dropping down via Snowshill, Temple Guiting and Kineton to Naunton where we all separated to make our way home.

The TR7 ran perfectly and drove better than it ever has. The engine was smooth with a good spread of power from low revs all through the range.
All in all, a grand day out.

Saturday, 7 May 2016

May, 2016. Carburettors

Since I fitted the alloy carb mounts last year I have never been happy with the idling speed.  It never wanted to go much below about 1000 or even 1100 rpm and because there has been stuff going on I have not bothered about it.  The engine runs perfectly, apart from the idle, with good power and reasonable economy so I decided it was time to investigate properly.

All the linkages etc were free and lubricated with no signs of sticking. There was no signs of any air leaks and all the breather hoses are connected and in good condition. Next thing was to put a flow meter on the carbs, and sure enough the front carb was drawing much more air than the rear one. The next thing was to loosen all the links between the carbs and set the idle on each one but even with the throttle stop completely undone the front carb was still drawing way too much air.

Synchrometer, air flow meter I use.
Something was obviously going on with the front carb so I decided the only thing to do was take them both off and have a proper look. First thing I noticed was that the fuel level in the jet of the front carb seemed much higher than the rear one, not an answer to the main problem but something else to sort out as well.  With the carbs off I found that the throttle butterfly on the front one was not closing fully. Holding it up to the light I could see the butterfly was clearly not centered properly in the spindle because light was still visible with it "closed". I was able to slacken off the two screws holding it and get it adjusted so no daylight showed. The butterfly must have been like since the engine went in the car and I think the old suspect rubber mounts had masked the problem.

Next thing to look at was the float levels. The newer types of SU carbs have a one piece plastic float which is non adjustable. Some folks put washers under the needle valve to alter it but I decided I might as well fit the best new ones from Burlen Fuel Systems. These are called StayUp Floats and come complete with a new needle valve and gaskets as well so should be an answer to the fuel level problem. They also have a metal lever so are adjustable as well if needed.

Burlen SU StayUp float kit
Well the new float kits came and are fitted in the car. It was a really easy job to fit them and adjust the floats to the correct setting.

The engine now runs much smoother and I can actually adjust the tickover to a nice 750/800rpm. It also drives nicer and pulls strongly from low revs. I popped into my local garage and checked it on their emissions tester.  CO2 levels were a little high so I set them down to a comfortable 4.5% .

We are out on a little Sunday tour with our GLAVON TR Register group tomorrow so it will be interesting to see how it goes in normal driving.

Monday, 18 April 2016

17th April 2016, Clutch master cylinder

Checking the lights before our journey home after the Corinium Run we noticed that the brake lights had stopped working.  A brief investigation showed it was the switch which was faulty so that needed doing as a priority. Its not a difficult job, just a bit awkward working up under the dash, but when I was replacing the faulty brake light switch I spotted signs of something dripping on the mat

That wet spot means trouble
 
and this is where the drips come from
The clutch master cylinder needed to be replaced soon before it let me down and I already happened to have a new one "in stock" so that was good.

I had been considering fitting one of those nice shiny Aeroquip type stainless hoses instead of the standard plastic one so now was my chance and I ordered one from Robsport. It arrived next day so that was great service.   Swapping the master cylinder and hose was pretty straightforward and only took an hour or so, but like the brake switch involved mostly working upside down under the dash. Why is that so much more difficult than it used to be when I was 20 years younger?

New master cylinder and hose

New hose at the slave cylinder end
After bleeding I now have a really smooth clutch pedal which feels better than it has ever been.

14th April 2016, Corinium Run

I asked my old mate Chris Riley to come along again on the Corinium Run again this year. I have know Chris since the 1970's and we have competed and serviced on rallies together ever since. He also helps me with the two man jobs on the TR7 so a very useful bloke to have around.

The Corinium Run is a classic tour of about 125 miles using "Tulip" navigation. For those who don't know this is a system named after the Tulip Rally in Holland who developed it in the 1950's. It uses a series of diagrams of the road junctions and features found along the route and the distances between them. Most serious crews have a special trip meter fitted in their cars to give a very accurate distances but we used an app on a mobile phone which worked pretty well. I will have to invest in a trip meter if we do many more runs.


Tulip navigation explained

2016 Roadbook, our actual route
 It was a nice day, but cold and even a slight frost early on. Leaving home we soon discovered that the heater blower was not working, not a disaster, but we had to rely on the air coming through the heater as we went along which turned out to be OK. It was my own fault because I had been working on the centre console and had not tested that everything was OK afterwards, beginners mistake.

This year they had allocated us the same start number as last year - 42 - how neat is that.

Start was at the Cirencester Town Football Club premises where they gave a us a nice bacon roll and a hot drink before the first car left at 9:30am.  The route then took us through Daglingworth, the Duntisbournes, North Cerney and Rendcombe before our first stop at Chedworth Farm Shop for a tea and one of their excellent cakes.

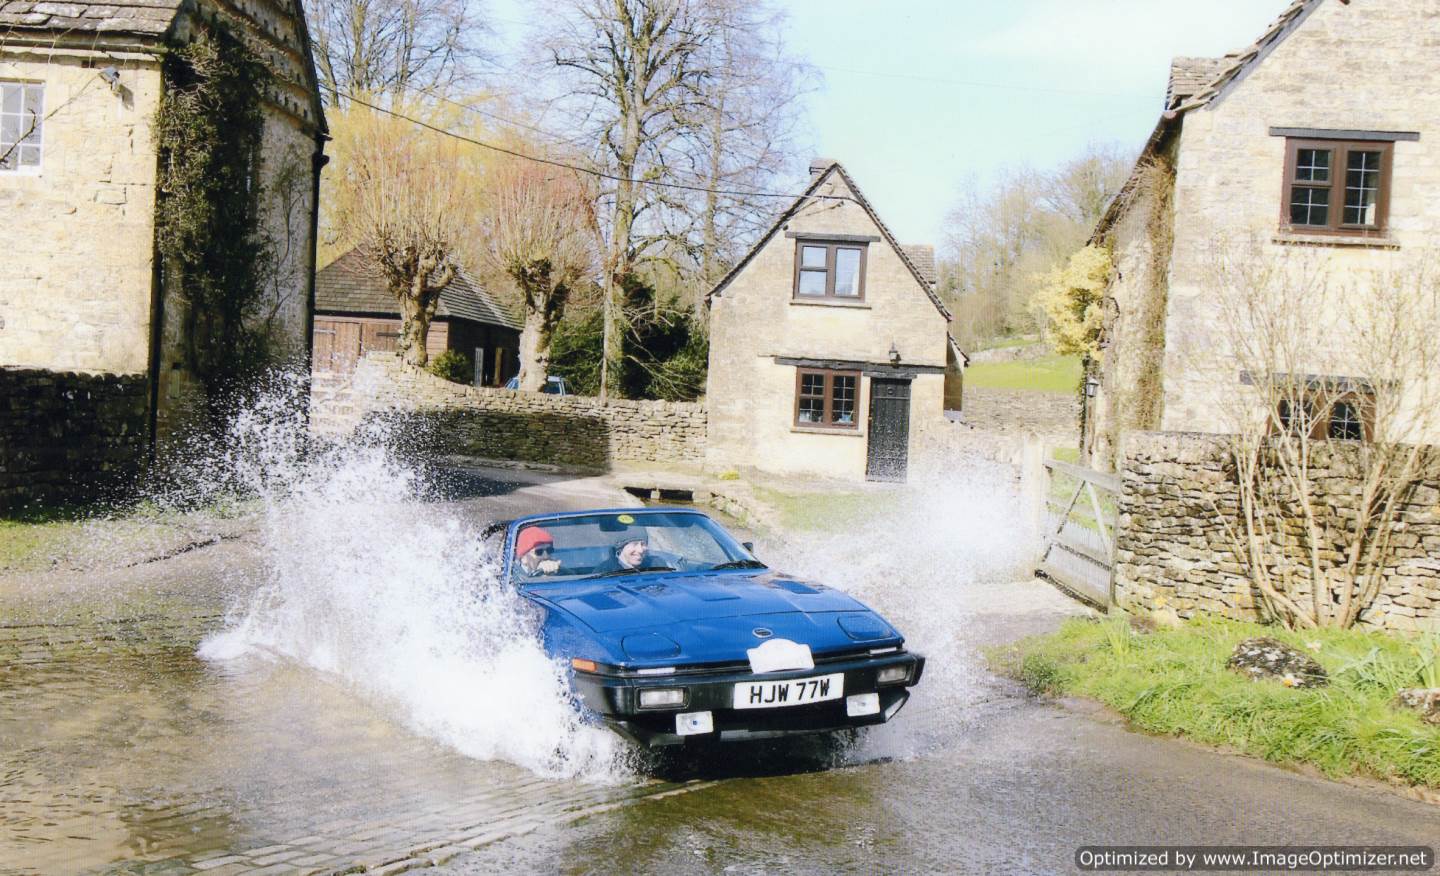
Duntisbourne Leer.   Sorry, but I can't resist a watersplash.
After refreshments our route took us further north along the lanes via Yanworth, Compton Abdale, Hawling, Hailes and Greet before the lunch halt at the Gloucestershire & Warwickshire Steam Railway in Toddington.   This suited us fine because both Chris and myself are steam enthusiasts. Turns out he has bought himself a day out there soon and will be actually driving one of the engines so I am very envious.

Wonderful stuff
The afternoon run then took us though Stanway and another ford to Guiting Power, Bourton on the Water and Turkdean before our tea stop at the Cotswold Lion Cafe. This is actually the old Northleach Prison and again they do very good cakes. Do you detect a pattern here - lots of stops for tea and cakes!
I tried to get the photographer wet

The tea and cakes are excellent here!
 We got back to the finish in Cirencester to be greeted with a choice of curries, chili or sweet & sour whilst the organisers worked out our fuel consumption.  This turned out to be 25.99mpg so not bad for a lot of twisty and hilly lanes.

Another great day out in the TR7, which is exactly what I bought it for in the first place. The car had behaved itself perfectly and we had really enjoyed ourselves.


Thursday, 7 April 2016

6th April 2016, Indicator buzzers changed

I originally fitted indicator buzzers in the old red car because I found it was too easy to leave the indicators on by mistake, especially with the top down.  I moved them with all the other good stuff over to the blue car but they have started to sound a bit poorly so I decided it was time they were replaced. Very easy job to do and they are cheap to buy, so I sourced a couple of different types off Ebay to see which sounded best.
Choice of different buzzer types
Testing them I found the round ones were a bit too strident and decided the rectangular ones would be better and more gentle on the ear. Only took a few minutes to make them up with some connectors ready to plug into the wiring adapter in the indicator stalk tail (see picture March 2015).

Buzzers ready to plug in
 Most difficult part of the job was reaching up under the dash to plug them in!