Thursday, 13 November 2014

October 2014, Gathering parts for new Sprint engine

Keeping track of bits with this useful gadget
Got a call from Mark Maynard that my block was ready to collect with its new liner installed and they have done a very nice job.  I spent an afternoon cleaning it off thoroughly in their wash tanks before bringing it home for a spot of paint. The bottom end has also been fully balanced which should help things along.
"New" block ready to start build


Started a little test fitting and tried the timing cover on the block - it was too tall!   Curses.  
Obvious really, they had to face the top of the block when they did the liner and now the cover was left about 10-12 thou proud so I had to take it back to be matched up.

The machine shop had also made up a few tappet shims because the re-profiled cam needs thicker sizes than the standard range so I can get on setting up the head.

  Fun job starts here.

And when all the valves were bedded in it looked like this


 I hope I put the valve springs on the right way up!


I don't need to add anything about this picture except the one you need is always missing!


The two pictures above show the differences between a standard TR7 flywheel and the Dolomite Sprint one. The TR7 has quite a bit more material on the rear face but the important working dimensions are the same. The Dolly one is also about 2kg lighter so guess which one I will be using?
Crank with the Dolly flywheel all balanced up.
...............................................................................................

I bought some posh stuff for the motor as well

Adjustable camshaft sprocket.
 45DHLA Dellorto carburettors
Shiny new manifold for the 45's

Tuesday, 14 October 2014

September 2014 - Engine transplant

My planned new uprated motor project is still delayed, holidays are approaching and the Blue car MOT is due soon - but it has no engine so what to do?
Answer: Swap the Sprint engine out of the old red car that will be scrapped soon.
Here it comes.

Sprint engine in its new (temporary) home.
We actually took the engine and box out in one go and swapped them straight into the blue car with only a pause for a cup of tea in between.  The car passed its MOT next day and went to the Tetbury Classic Car show the day after that.  Couldn't have been too bad because our club got the award for the best club stand at the show!
GLAVON group TR Register stand.
Since the show I have tidied up a couple of more items and swapped it onto the Minilite look-alike wheels that I intend to use.  The old Montego criss-cross ones have been sold.
Sort of finished look.

 Another "little" problem I forgot to mention is that the hood will not fold down because it fouls on the roll hoop. This is very annoying because it means the hoop will have to be repositioned/lowered to suit. Not an easy task as it will mean re-drilling the side mounting plates on the hoop.
I had naively thought that those pre-drilled holes in the hoop and the existing captive nut in the body are supposed to go together - but it seems not.
Luckily with winter approaching the top can stay up most of the time for the moment. I have enlisted a couple of friends and they will help realign the hoop while it is re-drilled to a new and lower position. Needs a nice dry day when we can all get together but no rush for the moment. 

May 2014, Blue car electrics etc

With the new engine being away at Maynard Engineering I had quite a bit to keep me busy getting the car ready to receive it. The old engine and gearbox were out so that gave me the chance to clean up the engine bay and sort out the wiring. There was a surprising amount of dirt on the crossmember and chassis rails apparently due to oil leaks from the old motor/box. I also wanted to have a good go at the wiring in the engine bay to make sure the dreaded TR7 headlamps raised and lowered as they should.  This is mainly a case of cleaning up all the plugs, contacts and the earth connections.  I cleaned them all and gave them a coat of dielectric grease to improve connections and keep out water.

Not too bad, but now is the chance to tidy up
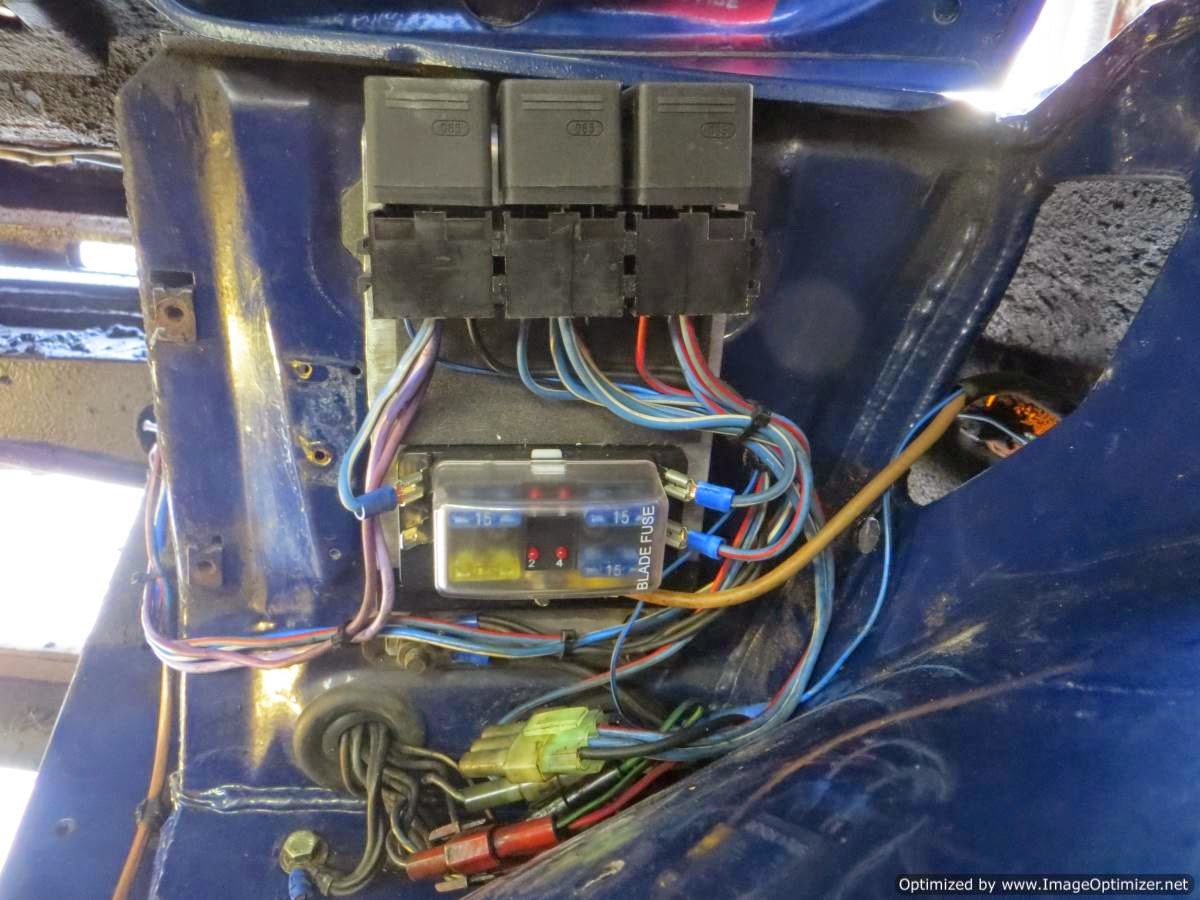
 It was also an opportunity to add relays to the headlight circuits.  The headlight switch and dip switch contacts carry all the current to the lights. With the TR7 wiring being over 30 years old now these have all seen better days and with new halogen replacement light units they are prone to failure so its a good idea to install relays.  These mean that the switch contacts only have to operate the relays which in turn carry all the main power.  I made up a small panel which plugs into the standard harness so it can be removed to return to standard if required. The panel has a 4way auxiliary fuse box fed by a permanent live cable and three relays to serve main beam, dip beam and spotlights. The fourth fuse provides power to the Kenlowe electric fan. 

Auxiliary fuse box and headlight relays
 After problems with a leaky fuel pump on the old car I decided it would be a good idea to fit an electric pump which would also be OK for the twin 45's on the new engine. Like several TR7 owners before me I used the redundant wiring for the heated rear window to feed the pump which is mounted close to the tank outlet. It also means you can switch it off when required. I chose a Facet low pressure pump which comes with a small inlet filter which I expect will need changing often so may be replaced with something bigger. It also seems a little noisy so will need mounting on rubber later.

Facet pump with its filter mounted under floor

The front bumper had the usual TR7 droop problem and I found the rubber mounting blocks had failed completely allowing the bumper to be waggled quite a lot by finger pressure alone. There is masses of stuff written about ways to repair or replace these mounting blocks but the alternative is to use the bumper from a TR7 Coupe which doesn't have them. Its all about the original design of the cars back in the 1970's when they decided to include a "harmonic damper" on the DHC models to improve ride quality on country roads and which also includes quite large blocks of cast iron in the ends of the bumper. Simplest solution is to simply use the bumper off a Coupe which bolts straight onto the car and my old red car just happened to have Coupe bumper. Not any more - its now on the new one!

Droopy bumper
No droop after Coupe bumper fitted.
  
 Testing the headlights and sidelights revealed the next problems. The drivers side headlight suddenly didn't work on main beam, but dip was OK.  I was concerned my new relays were at fault but I found a nasty old repair in the wiring, its was wonder it had ever worked at all.
This was fixed by replacing the headlamp tail with a good one from an old headlight I had "in stock".

Next thing was the sidelights and dash lighting was intermittent. This fault was more illusive and took a while to locate but was finally traced to the fuse box. Sidelights and dash lighting are fed from the same fuse and I had blown it when I was messing with fitting the sidelights in the new bumper. I had replaced the fuse but this turned out to be the cause of the problem. It was a brand new shiny one I had recently bought but although it was the correct rating and length the diameter was about 0.020" smaller than the original Lucas one. Doesn't sound much but it meant the clips in the fuse box were slightly loose causing a bad and intermittent contact.  I replaced it with an old dusty Lucas one and the fault was fixed!
Motto:  new shiny stuff is not always good.

Another little job to do before the engine went in was to replace the foam seal on the fresh air intake to the heater. Its a bit fiddly to do but not so bad when you can stand in the engine bay to work!  I just scraped off all the old crumbly foam and then glued some new stuff on.  The new foam I used is about 2mm thick and often used to line the drawers in your toolbox but seemed to be just the thing here. Putting the vent to the "closed" position held it in place whilst the adhesive set. Now when I close the vent it actually stops cold air coming into the car when you don't want it. Excellent. At the same time I did the similar job on the fascia fresh air vents as well. They also work properly now.

Friday, 10 October 2014

February 2014. Blue car - New engine story begins

Sorry but its been a while since my last entry but I got a bit sidetracked by life, its got a habit of getting in the way of doing things on the car.

Anyway, in February 2014 I mentioned on the TR7 and Dolomite forums that I would have a standard 2.0 litre engine and stainless exhaust for sale. Almost immediately a guy from Brighton with a Toledo got in touch and wanted the engine, and a Welsh chap wanted the exhaust. Problem was it was all still in the car. Big rush over the weekend and the stuff was on the garage floor ready for collection.
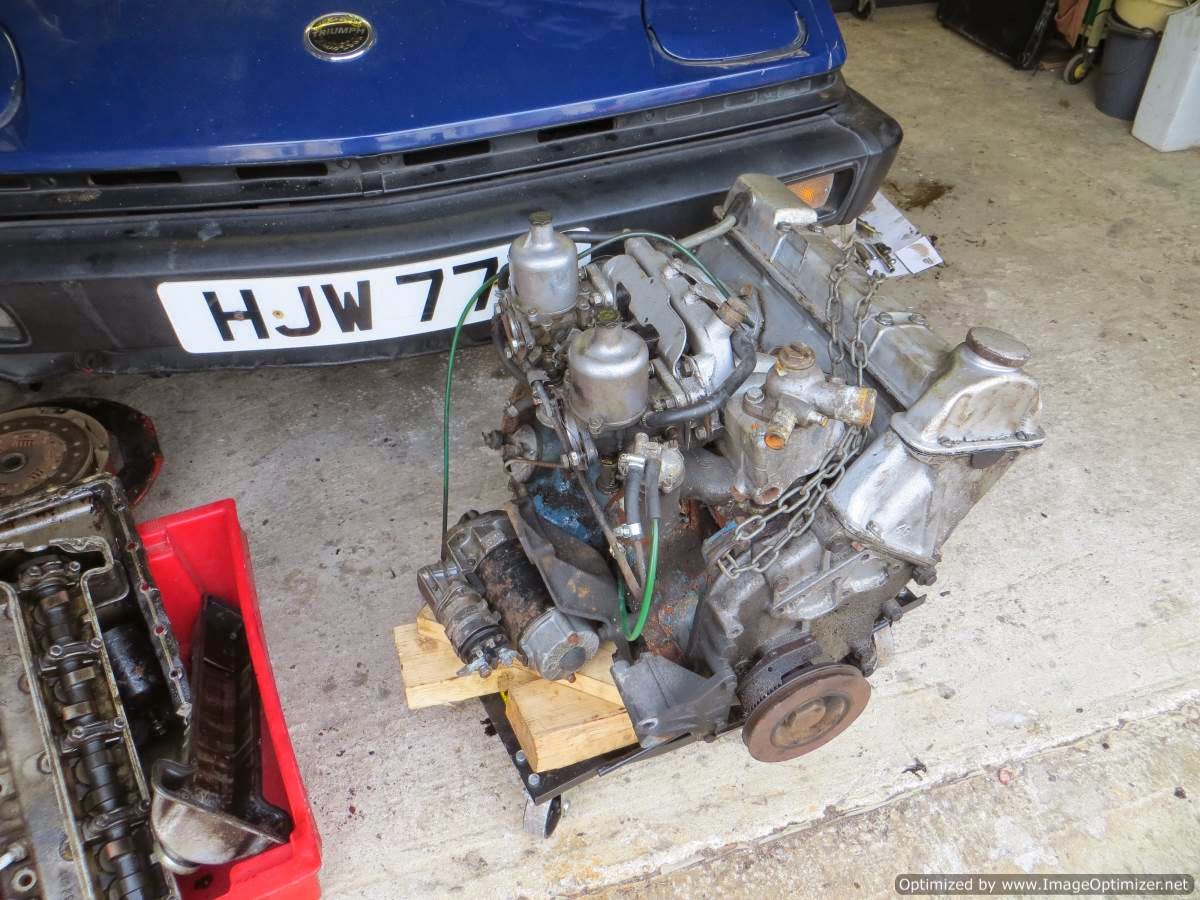
 
No going back now!


 .......................................................................................

 I had already sourced a running Sprint engine from a very rusty Sprint automatic and that has been stored in the back of the garage for the past year.  The plan was to rebuild it with some mods to give it a bit more power. Turns out the engine had been rebuilt after some kind of mechanical "accident". the block and bottom end were excellent but the head had been damaged in no.4 chamber.

No.4 chamber on the left has material missing below the exhaust valves

Then I was offered an engine with a stage 2 head, fast road cam, twin Weber manifold and very little use - I was tempted.
 
Having decided to go for the Stage 2 engine I collected it from near Heathrow and had to dodge the floods all around the area, remember that?   I obviously intended to give it a good look over before using it and turns out it was a very good job I did.

Stage 2 engine looking good
Still looking good.
OK, this is not so good.
No pad on the tensioner!
TR7 8 valve pistons.
Well as you can see from the pictures the stage 2 engine turned out to be a nightmare. Whoever had built the engine was no kind of engineer or mechanic.  Every part I took off showed evidence of zero mechanical sympathy.
To list just a few of the things I found:- There were huge amounts of a black sealer which had hardened and got everywhere as you can see from the build up in the sump. The engine had an electric water pump conversion but the adapter fittings had been bodged. The timing chain tensioner had lost its rubber pad and the pistons were standard 8 valve TR7 ones.
The head and cam seemed OK, with some cleaning up of the ports. Enquiries revealed the head had been done by S&S so should be good. The cam was a Kent Cams DMS1 which is a fast road profile but was a re-profiled one so will need thicker shims.

So, decision time, what to do.  The best idea seemed to be to simply use the best parts of both engines, the bottom end from the rusty Sprint auto with the head and cam from the stage 2 engine. The moving parts were all dropped off at Maynard Engineering to be balanced and all was going well until I discovered some slight water damage in the block where I had kept it on its side for the past year or so. Obviously a small amount of water had got into the chamber - bugger!  The marks were just too deep to polish out so that cylinder would now need a liner.  this meant the block now went down to Maynards as well.
Water damage in block. Too deep to polish out.

Monday, 16 December 2013

November 2013 - Putting blue car back together

After the leaking fuel puzzle was solved (see previous post) I started to think about putting the interior stuff back that I had taken out to help with welding and painting.  I also noticed the rear bumper metalwork was looking a bit scruffy so had a closer look and decided it had to go. See pictures below which explain why.
old bumper - past its best


I had a ring round and bought a good secondhand one from one of our TR Register group members who has several TR7's.  All it needed was a quick tidy up and a coat of paint. Fitting the plastic covers back was a fiddly job where you seem to need three hands but after a few choice words of persuasion it all went back together and is a much better result.

New bare bumper before plastic cover

 Now I could turn my attention to the interior.
--------------------------------------------------------------

Whilst the car was being welded and painted I got the bodyshop guys to install a couple of captive nut mounting points for the Aleybars  roll hoop that I have.  This had originally come with the old red car but had never been bolted in, it was simply just placed in position. Looked OK but was only decoration and wobbled about when you got hold of it.  At least now was the chance to install it properly, see new mounting plate with its captive nuts welded in position.

Plate with captive nuts for roll hoop
I also had a fine time scraping off the remnants of adhesive where the old carpet had been stuck on. It was very rough and jagged so had to be done but was a real swine to get off.  I tried various tools and concoctions but ended up with a petrol soaked rag as the best method. It took a couple of unpleasant hours but had to be done.
Job done  but I don't want to do that again!
Roll hoop and rear panel fitted
Came across a few of these stickers on the trim

Monday, 30 September 2013

September 2013. Blue Car Bodyshop work finished

13th September.  Went down to pick up the blue car after its time at the bodyshop having the rear wheel arches repaired, it was 5:00pm Friday, it was raining heavily and we were going on holiday next day.  The guys there had told me the car run out of petrol when they were moving it around and so I took a jerry can of fuel with me. Funny thing was I had put about two gallons in after replacing the tank so was a bit surprised and thought it was maybe a fuel pick-up problem but added the extra petrol anyway to be sure.

The rain even got to the phone camera
Two miles up the road I found out that it wasn't just a pick-up problem as the car started to miss then gradually just died.  It had all the signs and feel of running out of fuel so the only answer was a blockage or a pump problem.  Curses, no choice but to call the Towergate Insurance breakdown service.

A wet Friday rush hour turned out  to be a very busy time for the breakdown guys and I spent 2 hours waiting in the rain. Eventually one had to come from 40 miles away and it was fully dark when he arrived..  He was good but had no idea about the LT77 gearbox and the fact that it cannot be towed so I had to explain and persuade him to put the rear wheels on his tail-lift.

Next morning I dried out the car as best I could..  I left it in the garage with the hard top off, and the doors, boot and bonnet open and went on holiday to Portugal for two weeks sunshine.

Update:  On return from holidays the car was nicely all dried out so I made a start on trying to find out why it had broken down.  I was looking for a blocked fuel line so planned to begin by disconnecting at the tank end and blowing it through presuming I had disturbed some muck when I re-fitted the tank.. First step drain the excess fuel but I couldn't get a siphon to work. No problem, I'll blow it back the other was so I disconnected the feed pipe at the pump end and tried blowing back with the air line.
Imagine my surprise to hear the air arriving loudly in the tank - but with no sounds of bubbling - the tank was dry!  It had not broken down at all, I had run out of fuel.
I added a couple of gallons and it fired up perfectly but I then noticed a drip by the pump as I was reconnecting the rubber pipe. Closer examination proved the rubber was split and rotten although it looked pretty new. See picture below. I guess the lesson is not to assume fuel pipes are sound just because they look OK.
That explains the fuel leak then
.


Thursday, 12 September 2013

September 2013 GLAVON day out in the old car.

GLAVON group cars at Rodmarton Manor
Away from working on the cars we had a nice Sunday afternoon out at Rodmarton Manor. Its a local manor house built in the early 1900's in the Arts and Crafts style developed by William Morris. It was all made from local materials and is still complete with all the original furniture made for the house. Amazingly it is also still owned and occupied by the Biddulph family who commissioned it. The latest generation Mr Biddulph was there to welcome us, he seemed genuinely interested our cars and asked lots of questions.

From our point of view it also made a great place to show off the cars in front of the house.

Nice line up with my TR7 nearest the camera (one of the members came in his Lotus Elan +2)
 To end our visit we had a wander round the garden which was also laid out in the Arts and Crafts style and an old Canberra then proceeded to give us a diplay fly past. The aircraft is based nearby at Kemble and we think he was trying out his display for the Goodwood Revival next week.

Canberra fly past

 The week previously the red TR7 had decided to play up. The clutch master cylinder leaked most of its fluid down the bulkhead and then the new(ish) fuel pump started to leak as well. There was not time to change the master cylinder and the clutch still worked OK so I just topped it up and put a bottle of brake fluid in the boot - just in case.  The fuel pump leak turned out to be just the top loose so I was able to nip it up gently and that fixed it.  Did start to wonder though if the car was getting a bit agoraphobic, or maybe it realises its days are numbered so it is showing off?

On the day The TR7 behaved itself perfectly, Then on the way home it rained quite heavily so I got to try out the wipers in anger and the headlights worked as well. Magic.